
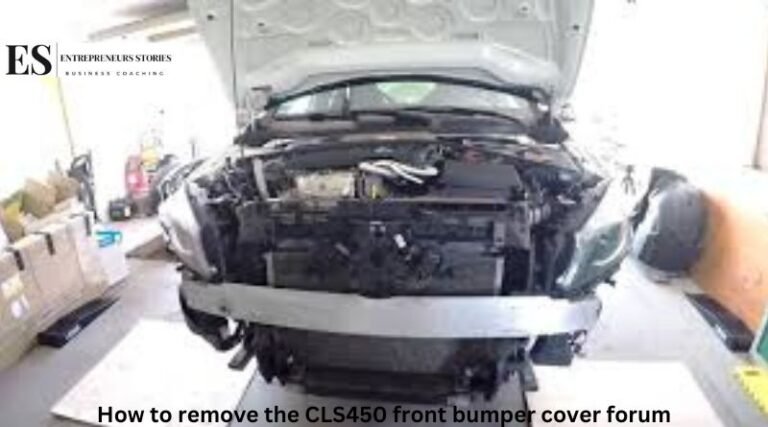
When it comes to maintaining or upgrading your Mercedes-Benz CLS450, one of the common tasks enthusiasts encounter is removing the front bumper cover. Whether you’re looking ,how to Remove the CLS450 Front Bumper Cover Forum ,install a custom grille, repair damage, or access other components behind the bumper, knowing how to properly remove the front bumper cover can save you time and money. In this detailed guide, we will walk you through the steps involved in removing the front bumper cover of a Mercedes CLS450, along with some tips and tricks that experienced users in various forums have shared.
Understanding the Importance of Proper Bumper Removal
Before we dive into the specific steps for removing the bumper cover, it’s essential to understand why proper removal is necessary. The front bumper of the CLS450 not only contributes to the aesthetics of the vehicle but also houses sensors, cameras, and other important components like parking sensors and radar systems. Incorrect handling of these elements during bumper removal can cause malfunctions or damage, leading to costly repairs.
Taking the time to familiarize yourself with the process will also prevent unnecessary scratches, broken clips, or damage to the bumper itself. Online forums dedicated to Mercedes-Benz vehicles often highlight the importance of proper technique, offering advice from fellow enthusiasts who have done the job themselves.
Tools You’ll Need
The first step to any vehicle maintenance task is ensuring that you have the correct tools. For removing the front bumper cover on the CLS450, you’ll need the following:
- Socket wrench set (preferably with 8mm and 10mm sockets)
- Torx screwdriver set (usually T20 or T25 for some screws)
- Plastic trim removal tools to avoid damaging clips
- Flathead screwdriver (optional but useful for certain clips)
- Ratchet extension (for accessing bolts in tight spaces)
- Blanket or protective mat (to lay the bumper on once removed)
Having these tools ready will make the process much smoother and reduce the risk of damaging your vehicle. Various automotive forums have repeatedly mentioned the importance of using the right tools to avoid unnecessary frustration or damage.
Step-by-Step Guide to Removing the CLS450 Front Bumper Cover
1. Prepare the Workspace and Your Vehicle
Before starting, ensure your workspace is well-lit and spacious enough to accommodate the removed bumper. Additionally, park your vehicle on a flat, level surface and engage the parking brake to ensure safety.
Start by disconnecting the car’s battery to avoid any electrical issues or accidental triggering of the sensors, cameras, or headlights attached to the bumper. Some online forums strongly advise disconnecting the battery, particularly when working with sensitive components like parking sensors or collision detection systems.
2. Remove the Screws and Bolts Underneath the Bumper
The first area to tackle is the underside of the bumper. You’ll find several screws, usually a mix of 8mm and Torx screws, securing the lower part of the bumper to the undercarriage and splash guard.
- Use your socket wrench to remove these screws, starting from one side and working your way across.
- Once these screws are out, gently pull the splash guard down to ensure it’s free from the bumper.
Some CLS450 owners on forums have mentioned that it’s helpful to mark the screws as you remove them. This helps during reassembly to ensure each screw goes back to its proper location.
3. Remove the Fender Liner Screws
Next, move to the wheel wells on both sides of the vehicle. To gain access to the screws that connect the bumper to the fenders, you’ll need to turn the steering wheel to one side to create enough space to work.
- Use your plastic trim removal tool to pop out any plastic rivets securing the fender liner to the bumper.
- Once the rivets are out, you’ll need a Torx screwdriver (usually T20 or T25) to remove the screws hidden inside the fender liner.
Be sure to check the forums for tips on removing these screws, as many users report them being a bit tricky to access without the proper angle or tool extensions.
4. Release the Bumper from the Top
After the lower screws and the fender liner screws have been removed, you’ll need to tackle the screws located at the top of the bumper, just below the hood.
- Open the hood and locate the screws that attach the bumper to the frame. These are usually easily accessible with your socket wrench.
- Be careful when removing these screws, as the bumper will no longer be securely fastened once they’re out.
At this stage, the bumper is only held in place by clips and any remaining screws. Forum users often recommend having a second person on hand to help support the bumper once it’s loose.
5. Unclip the Bumper
With all the screws removed, the final step is to carefully release the bumper from its clips. The bumper is clipped into the fenders and the frame, so you’ll need to work slowly and methodically to avoid damaging the clips.
- Starting at one end, gently pull the bumper away from the fender. You’ll hear the clips disengage as you pull.
- Move along the edge of the bumper, carefully popping the clips free as you go.
It’s crucial not to force the bumper too hard, as some users have reported breaking the clips, which can make reassembly difficult or require replacement parts.
6. Disconnect Any Electrical Connections
Once the bumper is free from its mounting points, you’ll need to disconnect any electrical connections before fully removing it. This includes:
- Parking sensors
- Radar systems
- Fog lights
Carefully unplug these connections to avoid damage. Many forum users recommend labeling the connectors to make it easier when it comes time to reattach them.
7. Remove the Bumper Completely
With all the screws, clips, and electrical connections taken care of, you can now fully remove the bumper cover. Have your protective mat or blanket ready to lay the bumper on to prevent any scratches or damage.
Reinstalling the Bumper Cover
Reinstalling the bumper cover is essentially the reverse of the removal process. Start by reconnecting any electrical components and ensuring they are securely attached. Then, clip the bumper back into place, being careful to line up the clips with their corresponding slots.
- Once the bumper is clipped in, replace the screws at the top of the bumper first, followed by the fender liner screws and finally the screws underneath the bumper.
- Double-check that all screws and clips are secure before reconnecting the battery and testing the car’s systems.
Common Challenges and Tips from the Forum Community
While the process of removing the front bumper cover on a CLS450 is fairly straightforward, there are a few common challenges that forum users have noted:
- Stubborn clips: Some clips may require extra force or a bit of lubrication to release. Be careful not to snap them.
- Accessing tight screws: In some cases, screws in the fender liner or under the bumper can be tricky to access without the proper tools.
- Reassembling wiring: Make sure all electrical connections are securely in place before reattaching the bumper.
Many forum users also suggest taking photos of the process to serve as a reference for reassembly, especially if it’s your first time performing the task.
Conclusion
Removing the front bumper cover on a Mercedes-Benz CLS450 can seem daunting at first, but with the right tools, preparation, and patience, it’s a manageable task that you can complete in your garage. Following the step-by-step guide above and referencing the experiences shared by other enthusiasts in forums will help ensure a smooth and successful removal process.
By learning to do it yourself, you not only save on labor costs but also gain valuable insight into the inner workings of your vehicle. Happy wrenching!
Read also: check